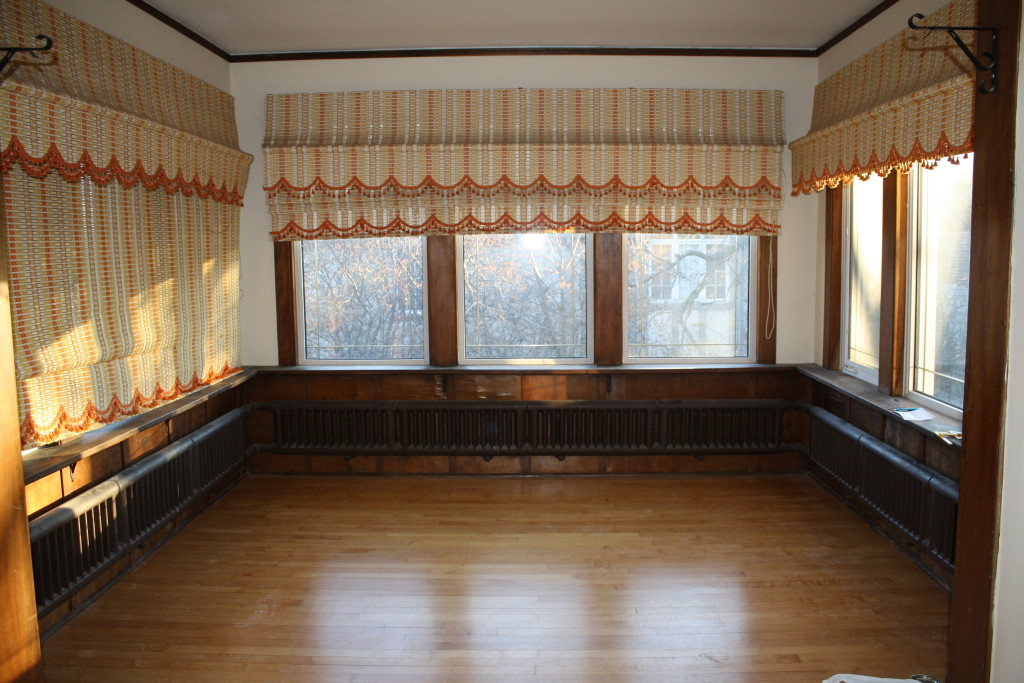
Kid Bedroom 1 – Before

The room we designated for our older son, age 5, was the former master bedroom in the house. (The current master was the result of an addition in 1988.) It has a lot of vintage charm, including a sun-filled room that was an addition sometime in the 1940s, plus a huge closet and an en-suite bathroom. Not a bad deal for a kindergartner.

Here’s what the room looked like at the start:

This is the view facing into the room from the doorway. (The bathroom door is on the right.)

IMG_8879 IMG_8880 IMG_8889

Here’s a closer view of the sleeping area. Note the vintage window dressings. We think these were from the 1950s or 1960s. They were really something.

IMG_8864 IMG_8866 IMG_8865

And here’s the view of the main area of the bedroom. (The closet doors are on the left in the photo below; my younger son is on the right. Watching my phone. Because I am a bad mother.)

IMG_8882


IMG_8881Next step? Fixing the wiring, then painting, painting and more painting. Stay tuned.

Ready for House 2.0 Posts – Finally

It has taken a while to get this blog up and running. Our piecemeal progress does not make for dramatic HGTV reveals and is mostly determined by budget, time constraints and how long it takes to get our children to bed. Before 9 p.m.? Paint brushes all around. After 9 p.m? Our desiccated husks collapse in front of Netflix.

As a refresher, we bought a fixer-upper in the Chicago suburbs–an American four-square built in 1913 that underwent additions in the 1940s and in 1988. We’re trying to restore it in a historically sensitive way, and we’re doing as much of the work as possible by ourselves. You know, like Chip and Joanna. Except with a lot more swearing. Like, a LOT more.

The team includes me, my husband, Andy, and my mom, Mary. We also have two young sons who “help” as well. You know, by going rogue with a paint roller or flushing sponges down the vintage plumbing.

We’ve finished a handful of rooms now, and I’ll start posting the photos room by room so you can see what we’ve done and where we started.

Word to your mother.

Make a Cork Board: House 1.0

IMG_53921-295x300

I filled a blank wall in my kitchen with a massive cork board to hold art projects, notes from school, and various other nonsense that piles up on the kitchen table. Standard cork boards were too small for my wall (not to mention boring), so I purchased some cork, fabric, and framing and got to work.

1.) Purchase cork board squares. I got mine at Widgetco.com—specifically the 3/8″ x 12″ x 12″ self-adhesive six-pack of wall tile squares.

2.) Choose fabric.  Buy fat quarters, which are much cheaper than yardage and work perfectly for the dimensions of the cork squares. If you’re looking for inspiration, The Needle Shop (2054 W. Charleston St., Chicago, 773-489-4230) in Bucktown is one of my favorite fabric spots. Or check out these sites:

fatquartershop.com

spoonflower.com

pinkchalkfabrics.com

warmbiscuit.com

fabric.com

I used Joel Dewberry’s Modern Meadow collection, which is one of many designer quilting fabric collections that tend to be way more fun and graphic than standard lines.

3.) Prepare the cork tiles. Unwrap the cork tiles and scatter them individually because they have to acclimate to room temperature for 72 hours before you can do anything with them.

IMG_5366-300x200 

4.) Wrap fabric around the tiles.  After letting the tiles sit out for three days, take the fat quarter fabric and wrap each cork tile like a present. (Note that I ended up not utilizing the adhesive on the back of the cork tiles because I didn’t want to adhere the board to the wall permanently.) Make sure and pull the fabric tight on all sides so that it looks taut in the front square and fasten the fabric to the cork with a staple gun.

IMG_5369-300x200

IMG_5370-300x200

5.) Duct tape everything. Arrange the tiles in the order you want them in the cork board, then flip them onto their backs. Enter the world’s most amazing invention: Duct tape. Duct tape across the back of the tiles in a tic-tac-toe pattern to keep the squares together and be sure to add a line of duct tape along the seams.

IMG_5372-300x200

IMG_5373-300x200

6.) Add ribbon. Optional: Run ribbon covering the seams in the front, which is decorative and also functional for items you don’t want to put a pin hole through. Simply run the ribbon along the seam, and then adhere it to the back with tape and a staple gun.

7.) Add structure to the frame. The duct tape is holding the tiles together at this point, but the board needs more structure. Buy moulding, preferably with a lip—I found some for .49 cents a foot at The Home Depot—and cut to fit. Cut the ends of the moulding at 45 degree angles. The frame may not be perfectly square because the cork tiles may expand and the fabric adds a bit of width to the squares. As long as the frame fits, it won’t be obvious to the naked eye. Fill the corners of the frame with caulk if there are gaps.

8.)   Finish the frame. Pick up the cork board, place it into the frame, and then drill nail holes into the frame. Hammer through the frame into each cork tile. (The middle will stay in place due to the duct tape.) Be sure that the nail goes into the cork tile and not between the cork and fabric. Once done, cover the nails with wood glue and paint the spots to match the rest of the frame.

IMG_5385-300x191

9.)    Add hanging hardware. Attach hanging hardware to the cork, rather than the frame. (If you hang it from the frame alone, it will pull over time and the cork will separate from the frame.) Run two screws into the back of the cork in the top left and right squares, and add picture wire between them. I used the staple gun liberally along the picture wire between the two screws (see below) for extra sturdiness and also because I love to use a staple gun.

IMG_5398-300x200

10.) Hang it.

IMG_53921-295x300

It turned out pretty cute and would work just as well for a kid’s room. Buying cork squares means you can do it on a much smaller (and therefore cheaper) scale. I used nine cork tiles total, which resulted in a 3 ft. by 3 ft. frame. I purchased two packages of six tiles ($48), 12 fat quarters to give me some options ($43), and framing ($10.) For about $100, I got an enormous cork board with more personality and style than anything off the rack.

Kitchen: House 1.0

The kitchen was one of our biggest projects in the house, and a lesson in how to paint cabinetry.

First, let’s check out the before pics:

Original kitchen

IMG_1624 IMG_1627

Original kitchen 2 Original kitchen 3 Original kitchen 4 Original kitchen 5 Original kitchen Pantry original

We wanted a new look for the cabinets, but could not afford to replace them. We decided to paint them, which was painstaking, but ultimately looked great. Here’s how you do it:

1.) Wipe the cabinets down with TSP.

2.) Steel wool the wood to ensure that it will take the paint.

3.) Use Sherwin Williams oil-based paint, which will resist the hard wear of a kitchen. Apply it in smooth strokes, using light layers with each coat. It takes a long time, so get comfortable. (Be sure to take off the cabinet doors. Do the boxes first, then the doors separately.)

4.) Replace or restore the hardware, depending on what kind of  shape they are in.

Once the cabinets were done, we also upgraded to granite countertops and added a tile backsplash. The pic below is when the countertops were off, and our cat made a home of it.

IMG_1629

And here’s the old porcelain sink, which we replaced with an undermount stainless. (We donated this one to Habitat for Humanity.)

IMG_1627

The final result:

08809470_8_3 08809470_9_3We splurged on Anthropologie knobs for the hardware because we’d saved so much on the cabinetry. Plus, I like to create situations where people tell me, “Hey, nice knobs.” The backsplash is mosaic tile that we found on clearance at Home Depot, so we really cleaned up there. My mom created the custom valance from quilting fabric I loved (the Joel Dewberry Modern Meadow collection), which also inspired the retro, 1950s wall color.

The final pantry, with the same finishes as the kitchen.08809470_10_308809470_7_3

Family Room: House 1.0

The family room was originally a three-season porch that previous owners turned into a family room. The walls were rough paneling that had been painted shabby-chic style.

Before:

Family room original 3

Family room original 1

IMG_1563  IMG_1561

We were originally going to rip out the paneling and replace it with drywall, but we didn’t have the money. Instead, we painted the paneling to buy ourselves some time, ripped off the mantel and painted the faux-brick gray. (We also made an area rug out of the carpeting we had ripped up in the other rooms. Recycling!) My mom made the curtains from Annie Selke fabric, and they turned out great. The Franklin stove, which I was originally just meh about, turned out to be a really cozy feature. We were happy enough with the results that we never did the drywall, and the family room became the hub of our house.

After:

08809470_11_3 08809470_12_3


Living Room: House 1.0

The living room just got a few cosmetic updates, as well as some refinished hardwood floors after we ripped up the carpeting.

Before:

Living Room Living room 3 Living room 2


After:08809470_3_3

IMG_3906

The chairs were an old garage sale find my mom got for $4 a piece. We had them recovered, and they still cost less than a standard, less comfortable chair from IKEA.


IMG_3908

For the walls on either side of the mantel, we applied a paintable, textured wallpaper and then painted it the same wall color. It turned out beautiful, and I think I’ll find a place to do it again in the new house.

IMG_3910

The old Expedit bookcase from IKEA (at least 12 years old at this point and still going strong) to showcase the library and camera collection.

Playroom Art: House 1.0

IMG_6466-e1359603297804-194x300

I had an old gumball machine that I hadn’t used in years, and now that gumballs are a choking hazard for half of my household, it was time to do something else with it. The solution? Turn it into a light for the playroom. And it was so easy.

1.) Start with an ordinary gumball machine.

IMG_6371-200x300

2.) Unscrew the top of the gumball machine and the top bracing mechanism. I also took out some of the lower “guts” to make room for more lights. All pulled out easily.

3.) Take the wall plug and push it through to the bottom and out through the side.

IMG_6378-300x200

4.) Wind the lights around the center pole, as though you were decorating a very small Christmas tree. I used a 300 strand of colored lights because that’s what I had leftover from Christmas, and that turned out to be a lot of lights. I ended up pushing some down into the lower portion, which has the fun effect of making the gumball dispenser area glow. The 300 strand is maybe too many lights, while the 100 strand looked too puny. A 200 strand (or two 100 strands) seems to be the Goldilocks number.

5.) Turn down the lights, and it will glow. (As far as I know, it cannot rock a mic like a vandal.)

IMG_6470-200x300

6.) The glass gets hot after a while, so do not leave the lights on for long stretches (overnight would be a bad idea) and make sure to keep it out of reach of kids. LED lights would generate less heat, so I recommend those. Enjoy!

Playroom Art: House 1.0

IMG_8246

IMG_7704-1024x682

The ferris wheel art in the basement was leftover from my son’s circus-themed first birthday party.

I took quilting and embroidery circles and spray painted them black. My mom helped me tie string to look like spokes (we superglued the knots to make them sturdy) and then bought blue and red takeout boxes from Oriental Trading Company to use as the gondolas. (We also superglued the top gondolas in place because they were hanging a little wonky when they were freewheeling.) The base is a piece from the bargain bin at Ikea.

It was just enough work that I placed the ferris wheel in the play room after the party because I didn’t have the heart to disassemble it after making all of those spokes.

Playroom Art: House 1.0

The flagship location of the Land of Nod (900 W. North Ave., Chicago, 312-475-9903) has a dramatic, whimsical piece of art behind the checkout counter.

IMG_2384-300x225

IMG_23861-225x300

My iPhone photos are not doing it justice, but it consists of dinosaur toys affixed to an enormous canvas, unified by blue paint. I loved it and decided to try it myself. This idea works with almost any theme or toy  so you can customize it to your kid’s room or play room. I chose outer space.

IMG_76021-200x300
I bought this bucket full of space-themed goodies at a craft store for about $15 (with a coupon), not bad bang for the buck considering it came with enough pieces to fill a canvas.
IMG_7604-300x200
I used an old canvas from a previous failed art project, but you can get them at any art store. I played with the arrangement of the space objects which included two space shuttles, two rockets, a satellite, a lunar module and plenty of astronauts. Once I was reasonably happy with the arrangement, I hot glued the pieces to the canvas, then spray painted the whole shebang silver. (In retrospect, I wish I had randomized the orientation of the astronauts a bit more, something that wasn’t as evident until spray painted, so keep that in mind if you are working on your own project.)
IMG_7673-300x200
The end result, hanging in the play room. When my toddler saw it, he gasped and said “That is so cool. Look at the outer space!” The total cost was $21 for the toys and spray paint, and it took less than an hour total (excluding spray paint drying time.) Happy crafting!