Monthly Archives: July 2017

Nursery – Final

This room is small but perfectly sized for a nursery, which really doesn’t need much more than a crib, rocker, dresser and bookcase.
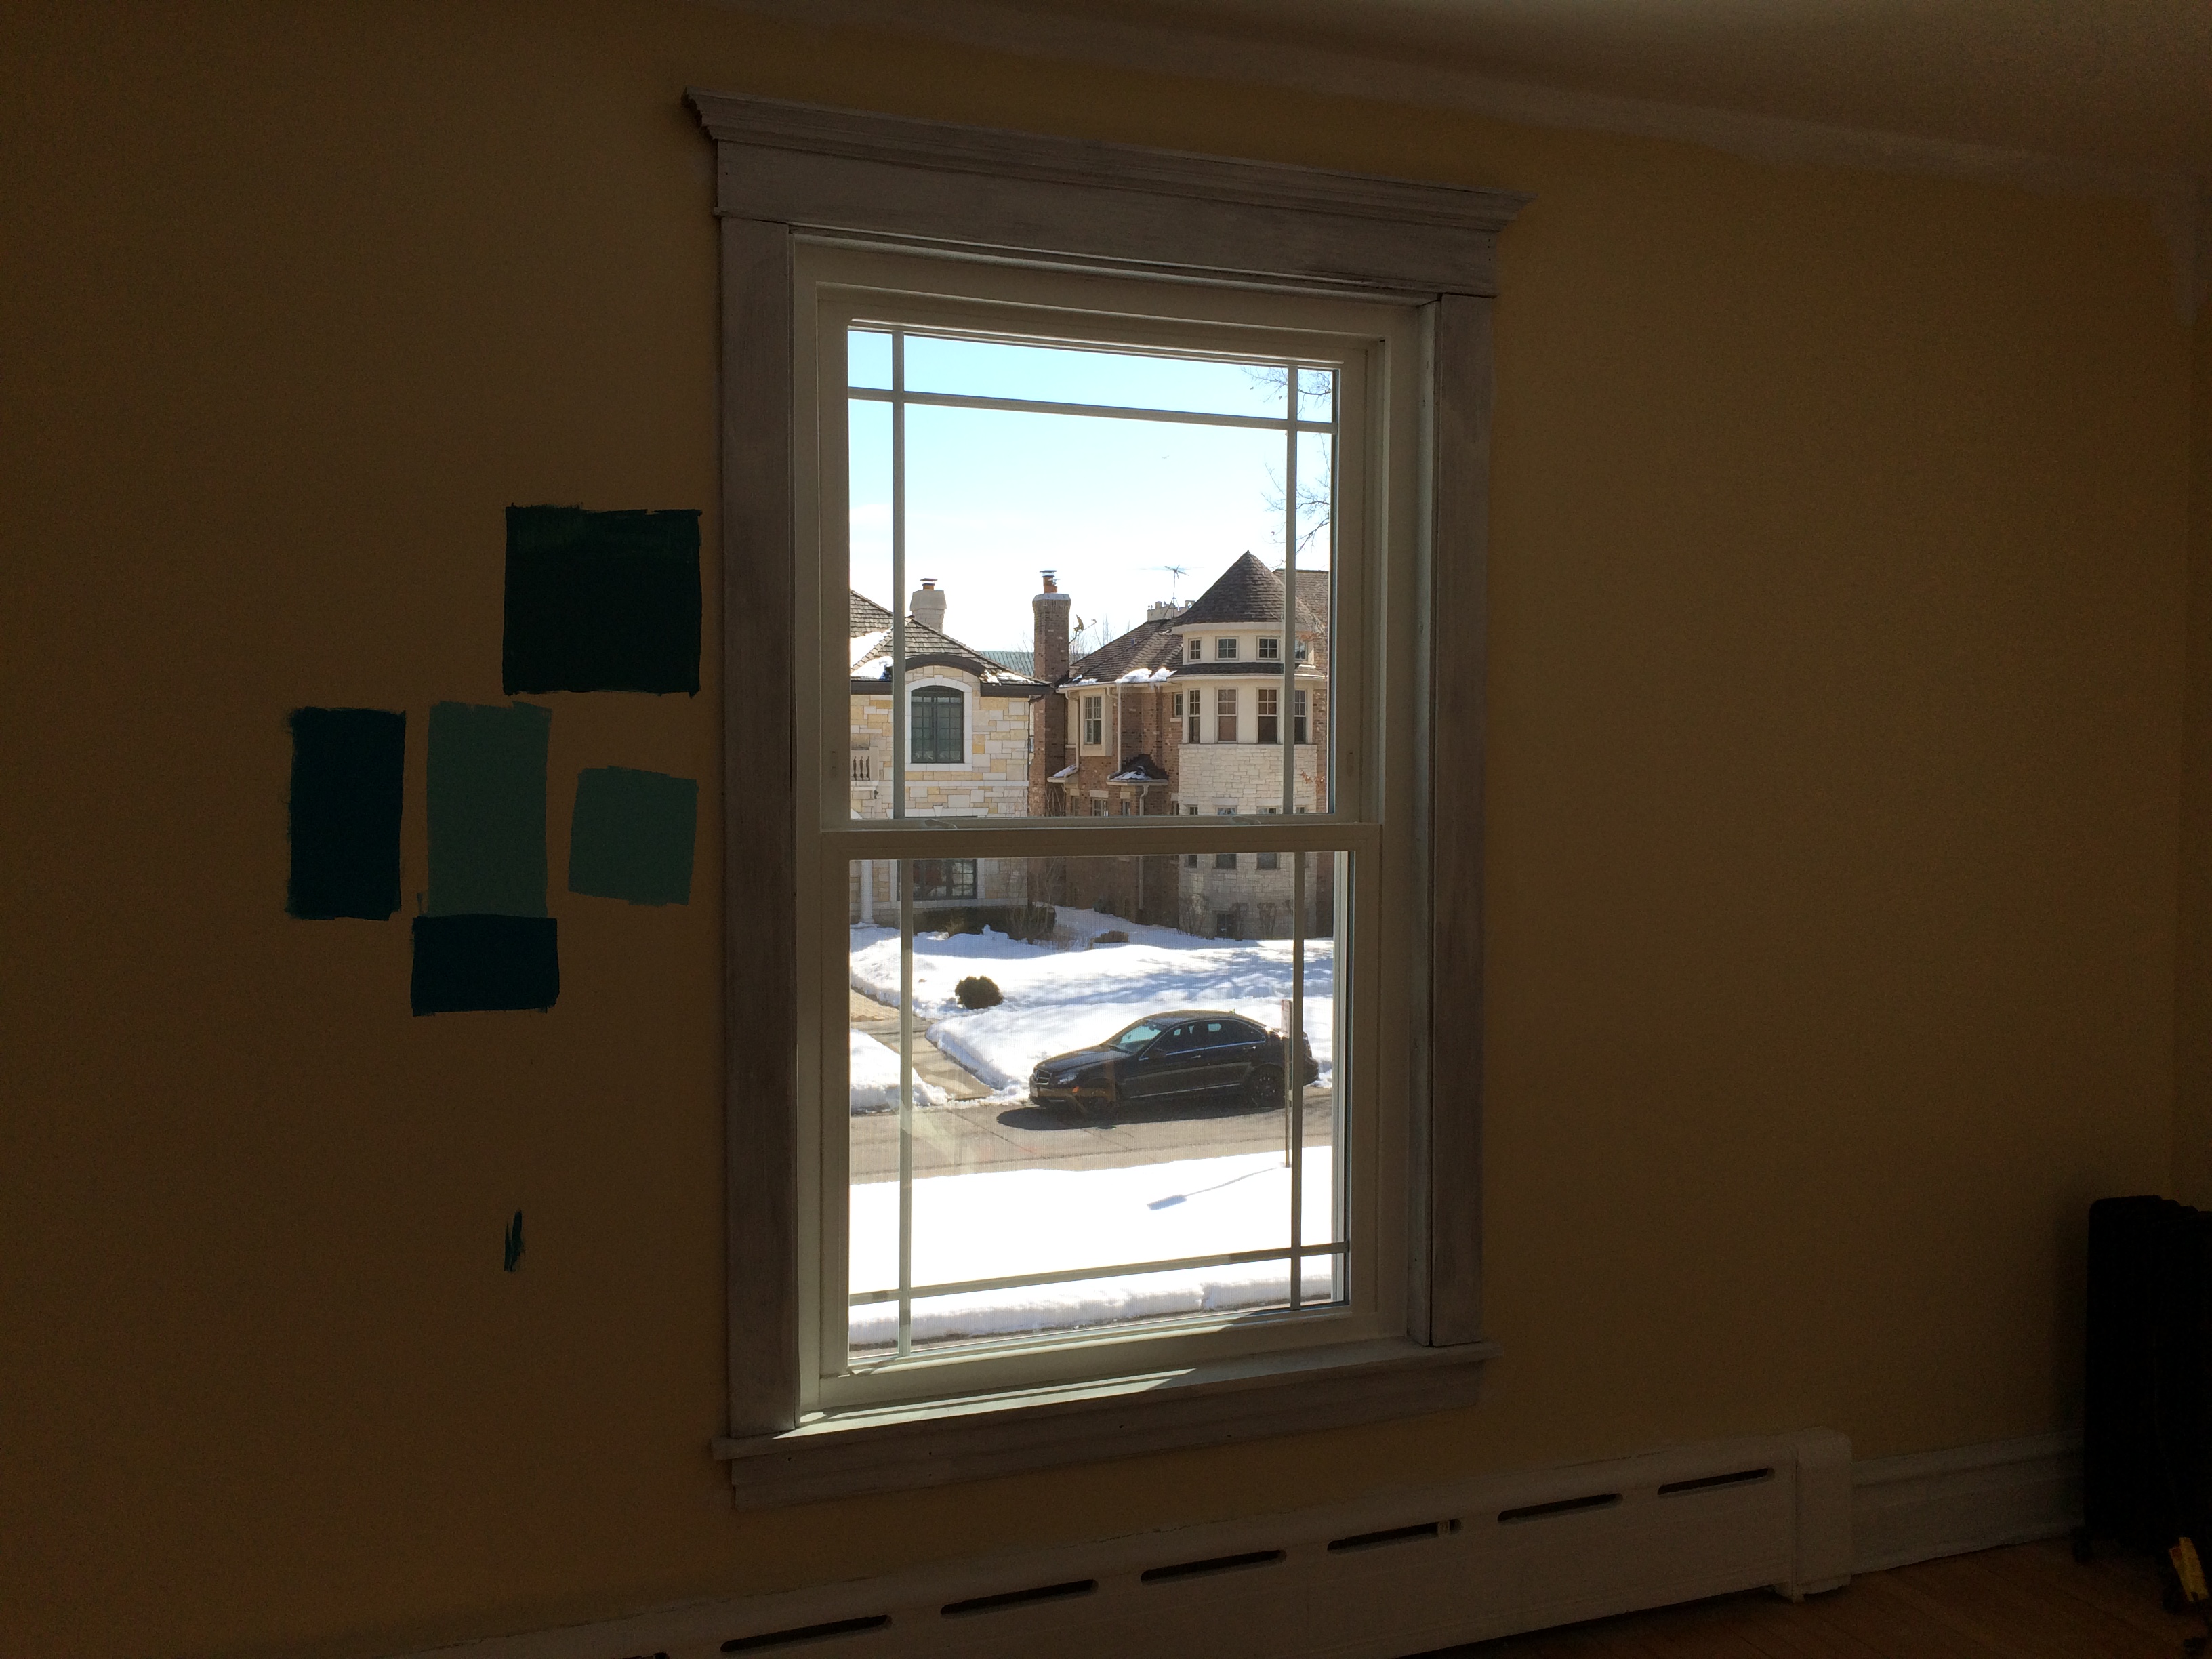
Before:

After:

I started with fabrics from Joann’s—one striped, one polka dot—in coordinating colors. My sewing wizard mom created the bed skirt, crib bumpers, valance and two changing pad covers. (If you are lucky enough to have seamstress skills or can impose on someone who does, this is a very budget-friendly solution.) Then we added blinds for room darkening purposes, and then covered them with Swiss dot curtains.

The art pictured to the left of the window is the embroidered alphabet that my mom made to hang in my nursery. Vintage.

The rocker, literally called the Best chair, lives up to its name. It is the most comfortable piece of furniture that we own, and we bought it in colors that match our living room furniture so we can move it downstairs when our kids age out of rocking.

Before:

After:

Elephants are the unifying theme, as you can probably tell.

The dresser wall


It drives me crazy that the art is wonky in the photo above, but oh well. Proves I dusted at some point. This dresser was my grandma’s, but it needed an update. My mom painted it and added Anthropologie knobs to match the decor. It’s perfect as a platform for a changing pad and the small drawers are ideal for separating tiny baby clothes. You’ll notice the lack of  artwork above the changing pad because we learned the hard way that our kids will kick and smack at it while being changed until it falls off the wall. So blank it will stay.

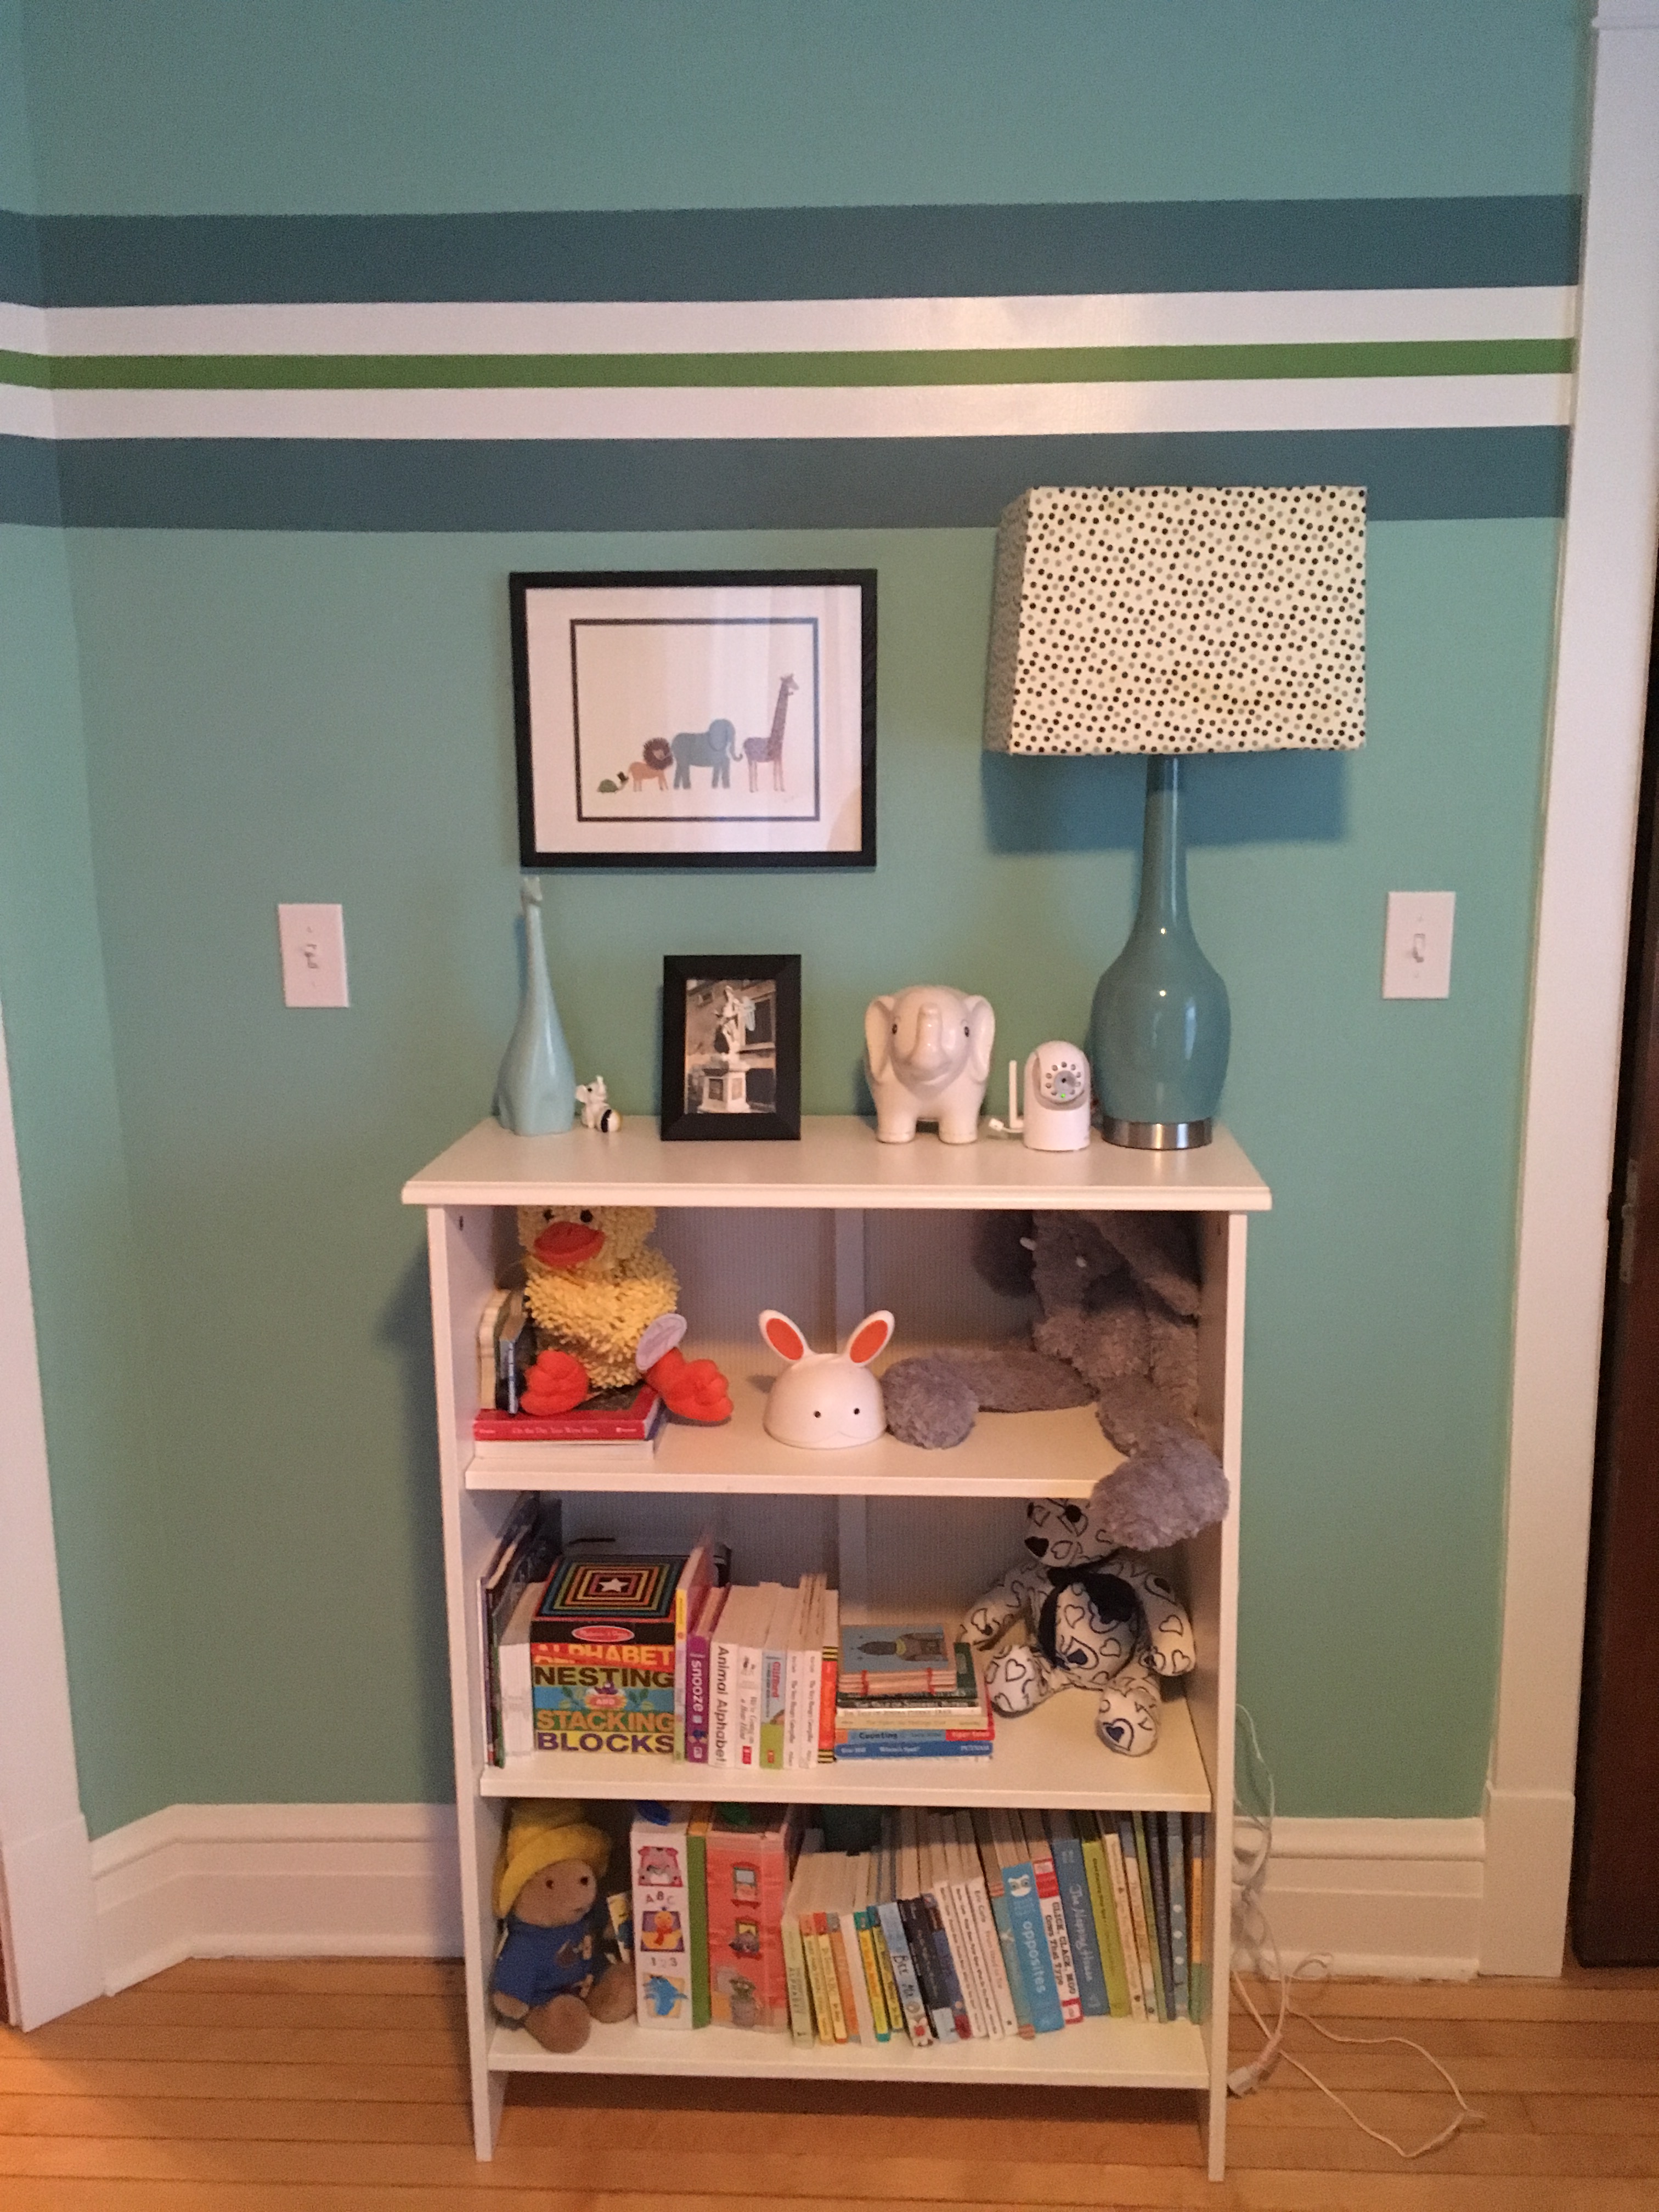
The bookcase, with custom lampshade by my mom.

Nursery – Stage 2

The design for this room came from the nursery decor we had in our old house, with a few updates. It was inspired by a fabric that we found at Joann’s when I was still pregnant with my first, and I liked it so much I wanted to continue it here.

First, we painted the walls this jewel tone greenish-blue.

Then it was time for the stripe.

We taped off a wide stripe in the upper third of the room, which was very tricky. Kudos to my mom for painstakingly taping a straight line in an old house where nothing is straight. (There are parts where she had to improvise so it looked straight to the eye, rather than be guided by what the level indicated was straight.)

The next step was filling in the strip with this teal color, which is where we stopped in the old house. This time, I had the idea to add yet more stripes inside the stripes. What followed was a taping nightmare that I forgot to photograph, probably because my mom and I were too busy grumbling swear words to be bothered by such trifles. After the teal wide stripe was painted, we waited a week before proceeding so that the tape wouldn’t pull up the fresh paint. Then we taped off the area for the white stripe, filled that in, and waited another week. Finally, we taped off the area  for the grass green stripe (a width we mostly eyeballed) and called it a day.

It was a huge pain, it took about three weeks, and  concluded with my mom telling me, “No more stripes. Ever again.”  I hope the baby enjoys them, because they are here to stay.

Here’s how it turned out. I love it.


Nursery – Stage 1

This room didn’t have much that needed re-doing — it was mostly a decorating job, but we did have to replace the windows. There was a full-on breeze coming through them, and when my husband went to open one, he was almost guillotined. So…those had to go.

The doors were in very good shape, so we wanted to keep those the natural wood, as we did in the other bedrooms.

The baseboards were not so lucky – they had odd cuts from old remodels and the stain color was not consistent, so my husband repaired those before painting them white.

Here’s a view of the room after the trim was painted a fresh white, with the walls still puke yellow.

Here’s a view of the new windows with a Prairie-style grid that look great from the inside and outside and also stopped the Arctic chill that had been this room’s previous hallmark.